The Config Tool lets you configure your ProAudio matrix from a PC — no command line required. Changes apply instantly, but must be saved or they'll reset on power cycle.
Available to registered installers at www.monitoring.pulse-eight.com/Downloads/ProAudioConfigTool listed under the downloads tab.
You'll need an Installer ID — contact your distributor if you don't have one.
The tool talks to your ProAudio matrix over your network and sends the same commands as a PuTTY terminal but with an intuitive installer focussed UI
The Sidebar
The sidebar runs down the right side of every tab. It shows device info, network settings, and the tools for saving and restoring your configuration.
System Info
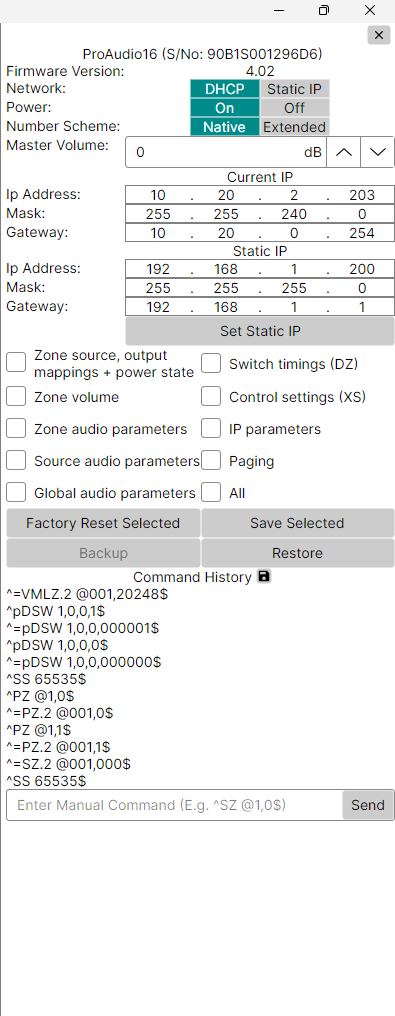
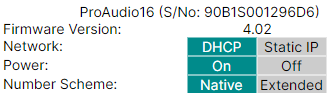
At the top you'll see your device model, firmware version, and three toggles, plus the Master Volume control (in dB), which affects all zones at once.
Network Settings
Shows the current IP address, subnet mask, and gateway. You can also enter a Static IP here for when DHCP is turned off.
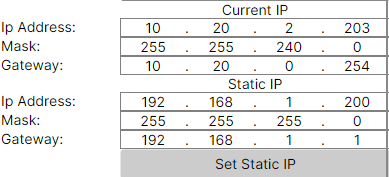
Changes take effect once you click Set Static IP.
Save Settings and Factory Reset
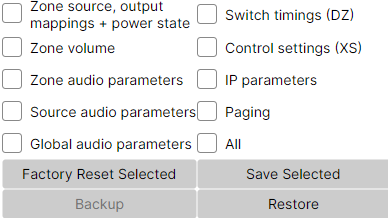
Tick the checkboxes next to the settings you want to save or factory reset, then click the corresponding button.
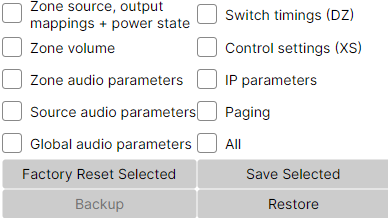
Tick the checkboxes next to the settings you want to save or Factory reset, then click the corresponding button.
Any category with unsaved changes will turn red in the sidebar, making it easy to spot what still needs saving.
Saves ticked settings permanently. A ^SS command is sent and the matrix confirms with ^+$ in the command history.
Resets ticked settings to their factory defaults. Tick All for a full factory reset.
Backup & Restore
Tick the settings you want to back up, then click Backup and choose a location on your PC to save the file. To restore, click Restore and select your backup file — the tool sends all the required commands automatically.
Command History
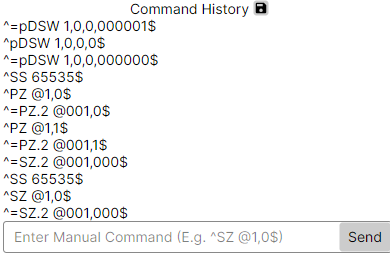
At the bottom of the sidebar is a live feed of every command sent to and from the matrix, regardless of where it's sent from (e.g. a control system or the Config Tool itself). This is useful for troubleshooting — you can see exactly what's being sent and whether it's being acknowledged. You can also type PuTTY commands manually into the box at the bottom (e.g. ^SZ @1,0$) and click Send.
Stereo Zones Tab
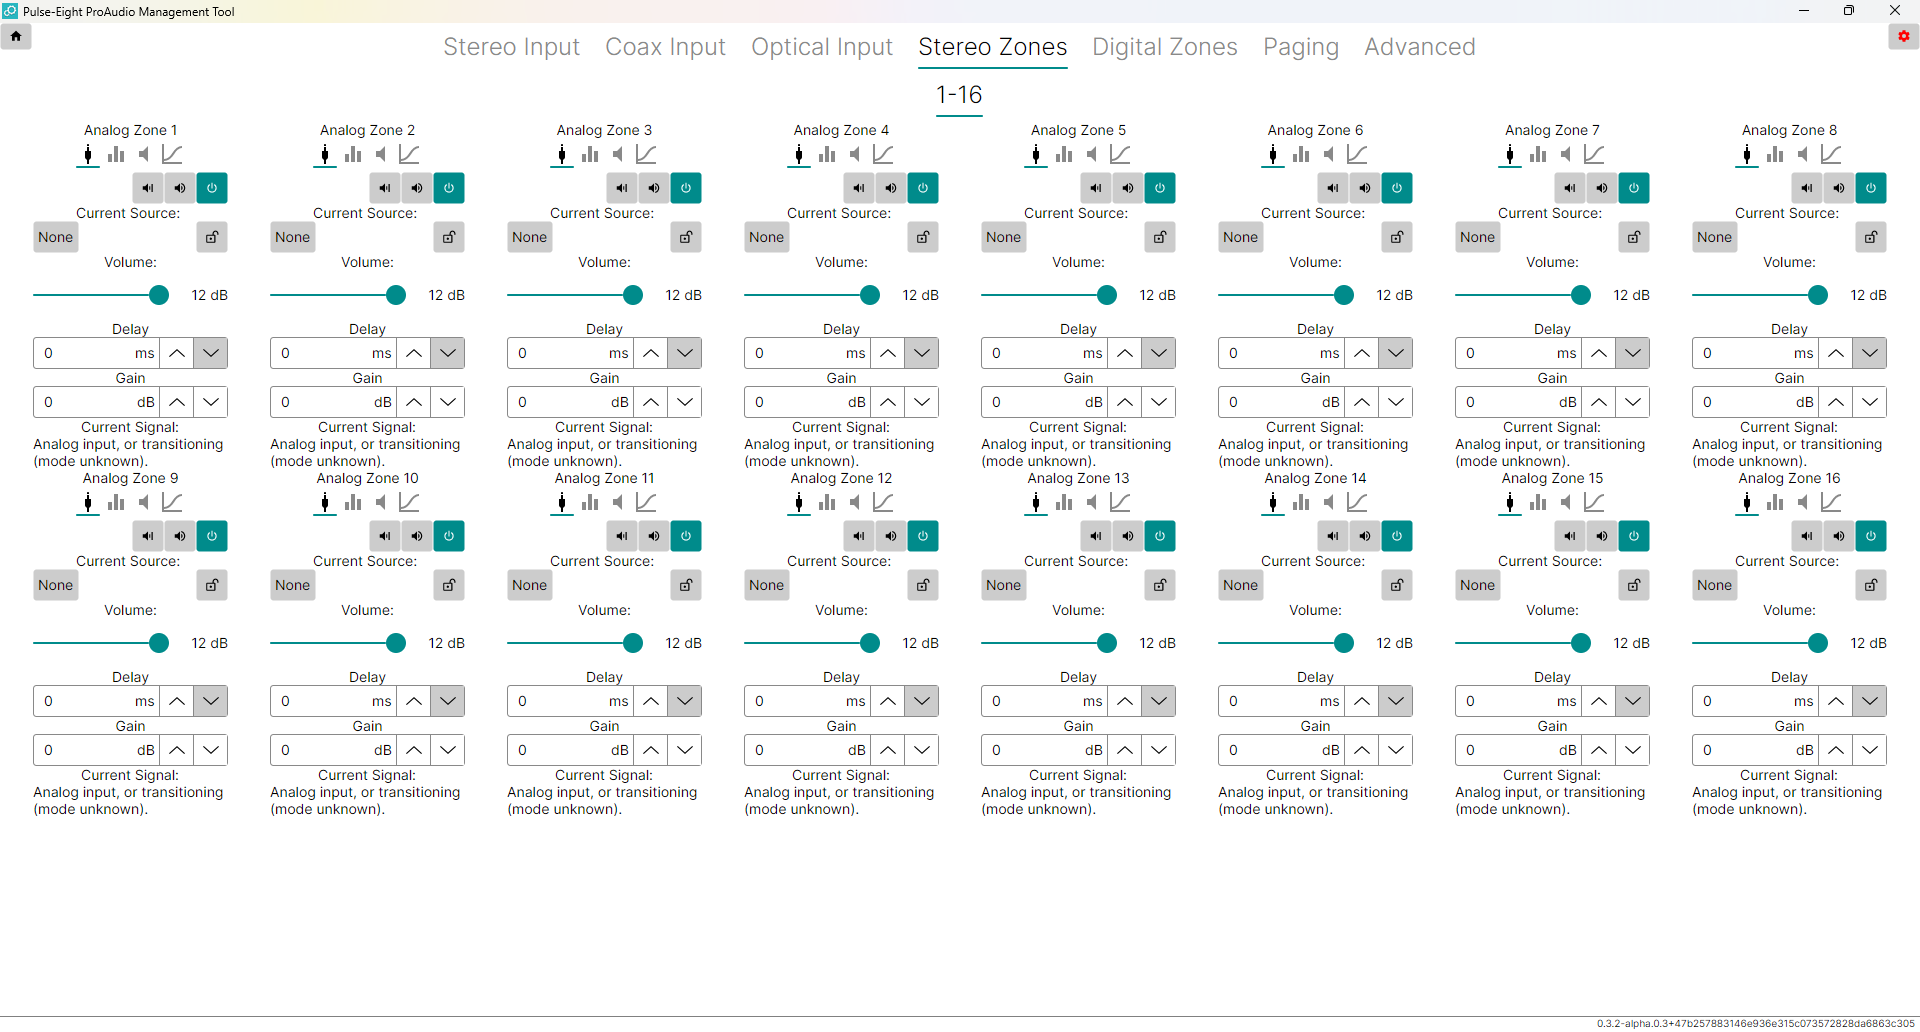
The main tab for controlling your analogue audio outputs. Each zone has its own column with sub-tabs accessible via the small icons at the top of each zone.
General Tab (Default View)
| Button | What it does |
|---|---|
Hard Mute  | Completely disconnects the zone from any audio source - the equivalent of setting the source to nothing. Use for silencing a zone entirely, not for everyday muting. |
Soft Mute  | Mutes the volume using the audio processor. This is the normal way to mute a zone - audio keeps flowing but is silenced. |
Zone Power  | Powers the zone on or off. No audio will pass when the zone is off. Green = on Grey = off. |
Current Source — click the source box under a zone to pick which input to route to that output. A list of all available inputs appears; select one, or choose None to route nothing.
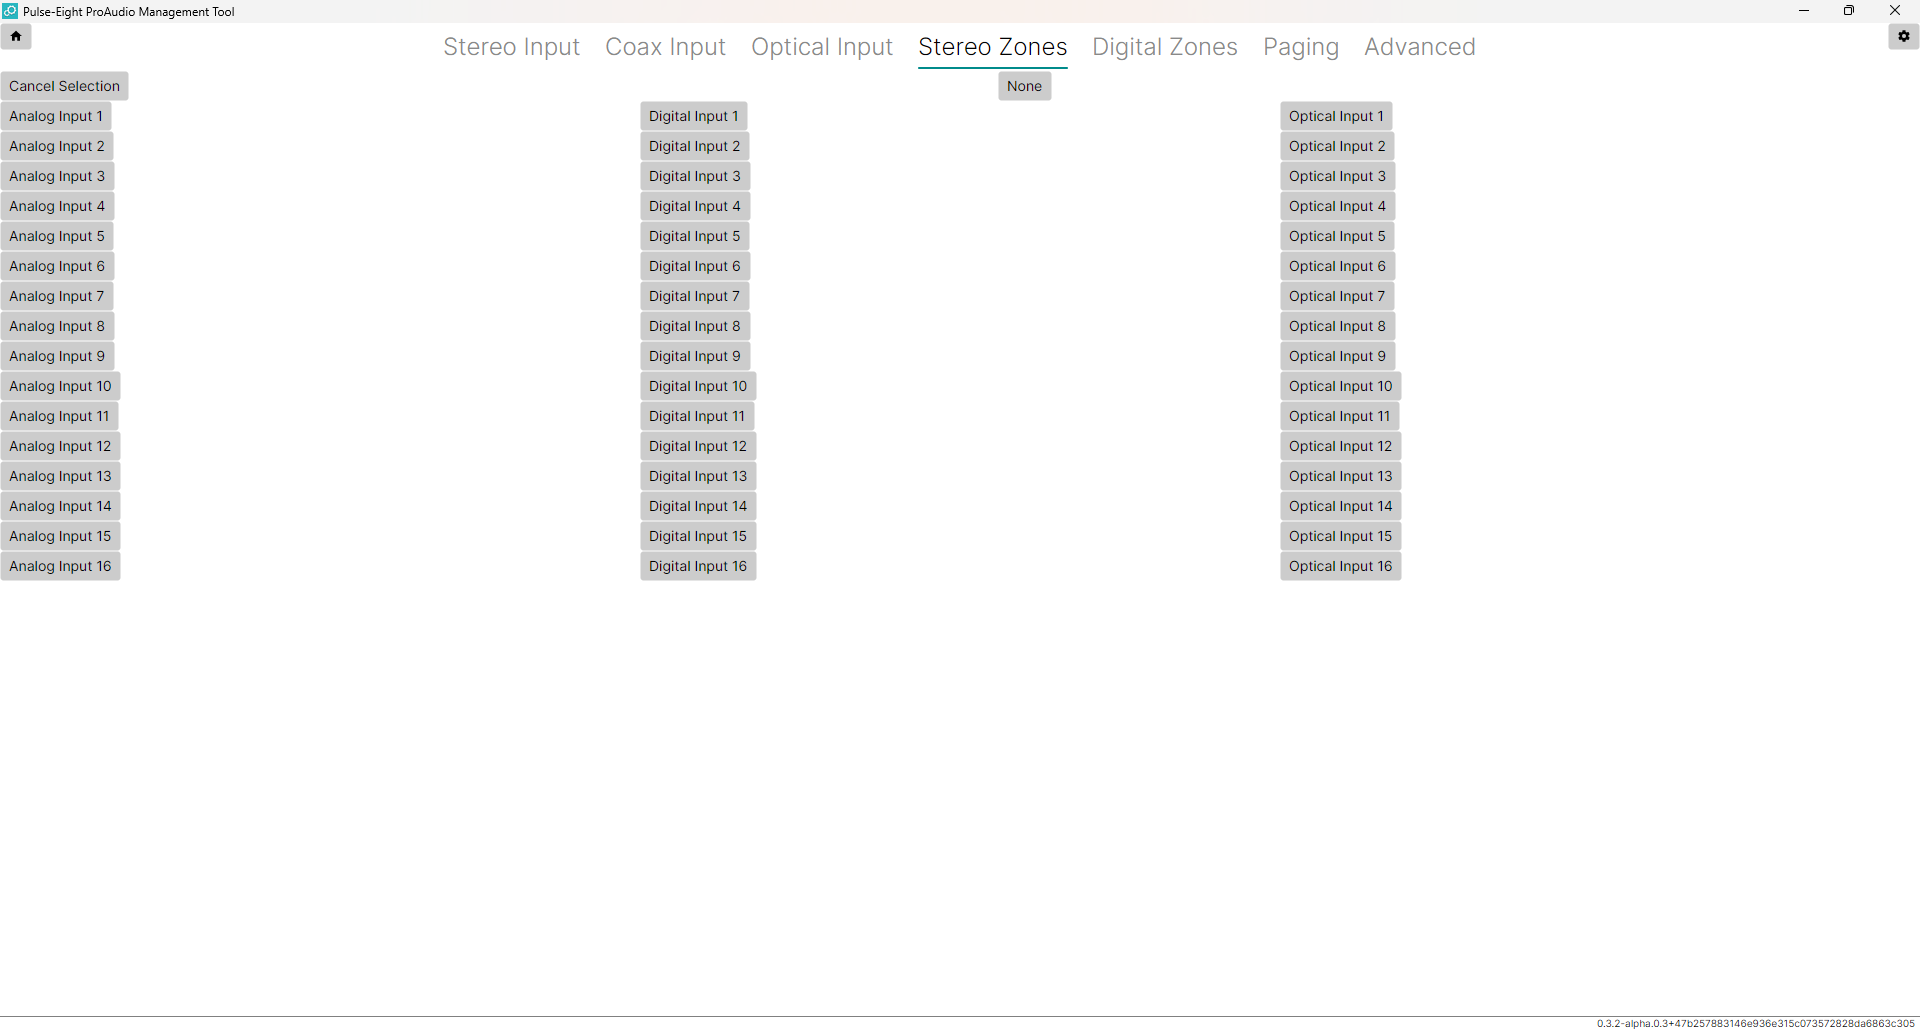
Zone Locking — the padlock icon next to the source box links multiple zones together so they always follow the same source.
Volume — the slider controls the output volume for that zone. Drag left to reduce, right to increase.
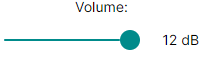
Lip Sync Delay — adds a delay to the audio to compensate for video processing lag. Use zone delay when the video processor sits between the matrix and the screen. Use input delay (on the Input tabs) when the processor sits between the source and the matrix.
Output Gain — fine-tunes the volume level for a specific zone to match the sensitivity of the amplifier being used. Range: −24 dB to +24 dB. Useful when different zones use different amplifier models.
EQ Tab
Accessed via the EQ icon at the top of a zone. Provides Bass, Treble, and a 5-band equalizer.
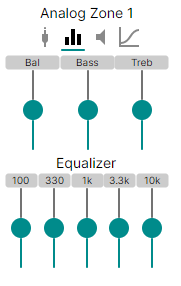
Levels Tab
Accessed via the Levels icon. Controls volume limits and mute behaviour for the zone.
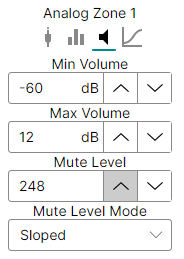
| Setting | What It Does |
|---|---|
| Min Volume | Sets the lowest usable volume. Going below this fully mutes the zone — avoids the "noise floor" of a quiet room. Raising back up jumps straight to minimum level. |
| Max Volume | Prevents the volume being set above this value — protects speakers and amplifiers from being over-driven. |
| Mute Level | Sets how much the volume drops when muted. 0 = no reduction, 248 = maximum reduction. |
| Mute Level Mode | Jump = instant mute. Timed = fades over a set time. Sloped = smooth gradual fade in and out. |
Filter Tab
Accessed via the Filter icon. Sets a high-pass or low-pass filter for the zone — typically used when configuring a zone for a subwoofer. See the subwoofer setup guide for details.
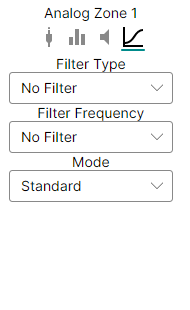
Digital Zones Tab
Controls the digital (coaxial) audio outputs. These have fewer options than analogue zones — no volume or EQ controls, since the digital signal passes through unprocessed.
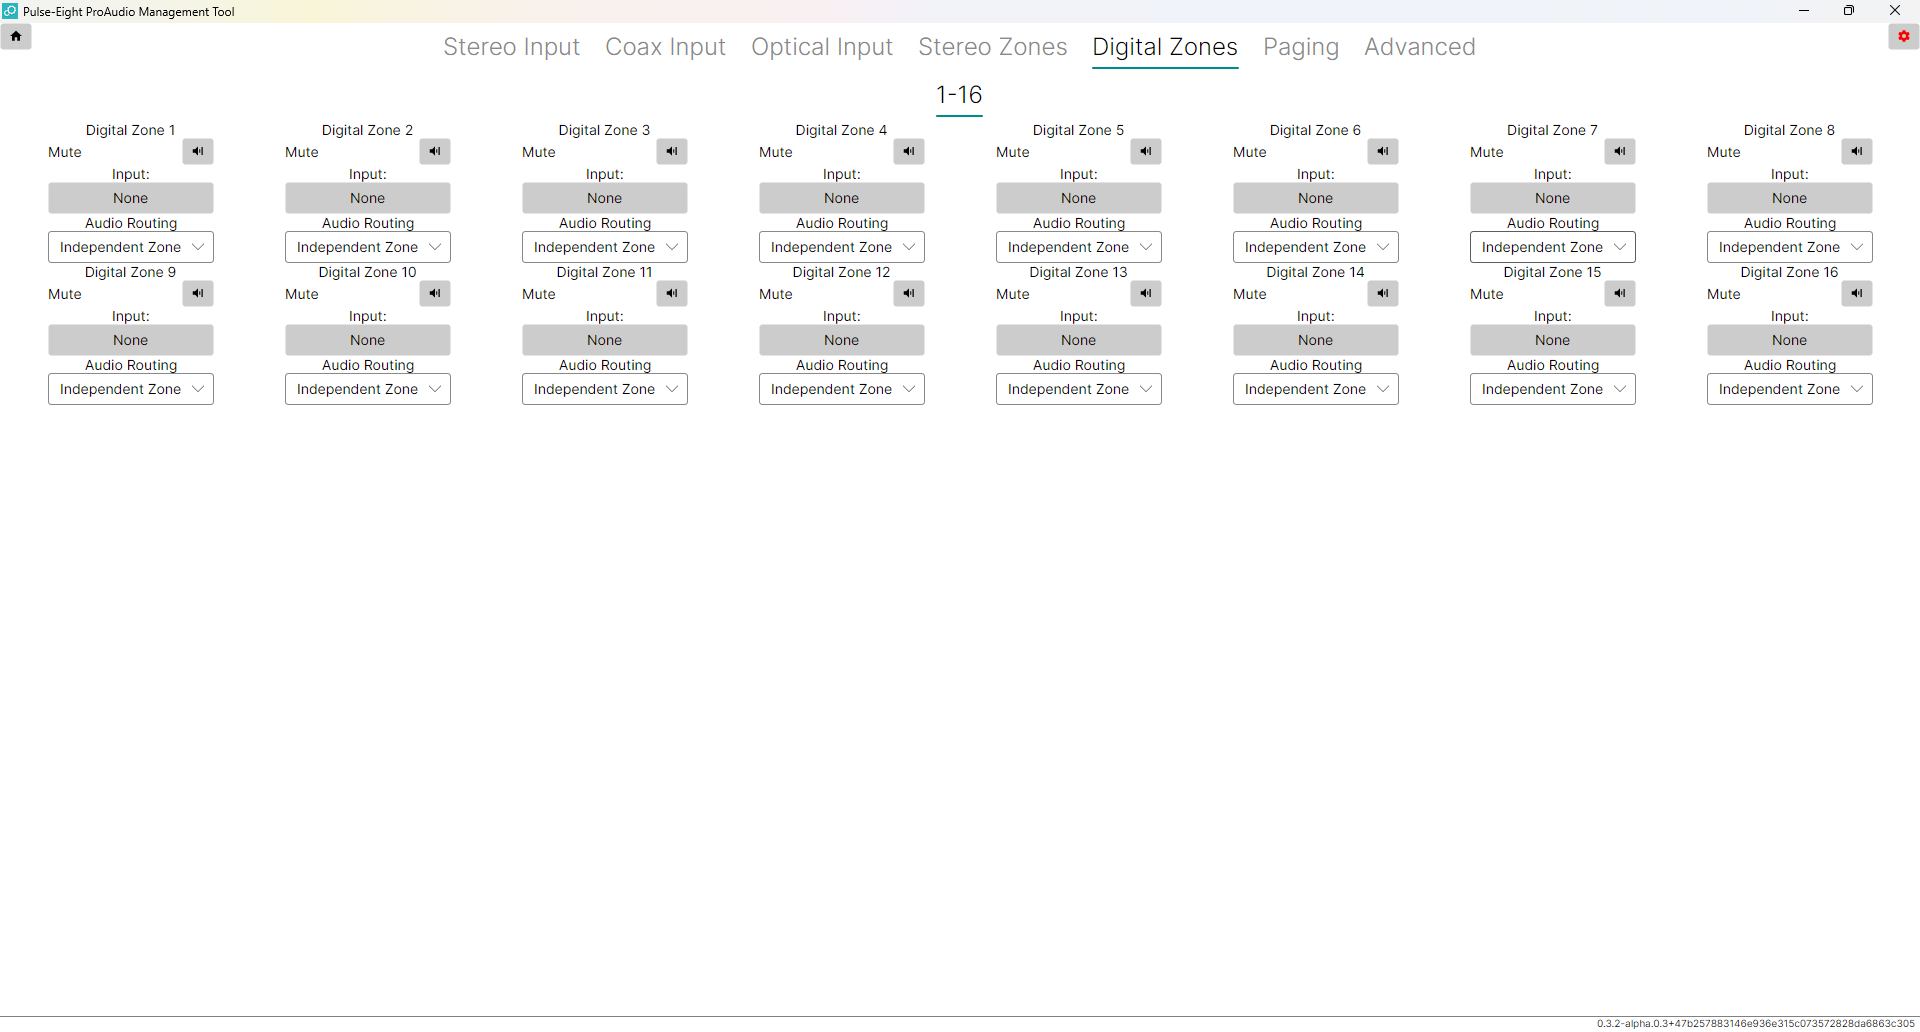
| Setting | What It Does |
|---|---|
Hard Mute | Disconnects the digital zone from its source. Same as the analogue version. |
| Input | Select which source this digital output plays. Click the box to pick from the full input list. |
| Audio Routing | Independent Zone — the digital zone picks its own source and supports Dolby 5.1/DTS. Mirror Analog Zone — mirrors the matching analogue zone, converting to PCM stereo. Coax 1 mirrors Analog Zone 1, Coax 2 mirrors Zone 2, and so on. |
Stereo, Coax & Optical Inputs
These three tabs look identical and work the same way — one for each input type. Adjustments here affect all zones using that input, rather than a single output.
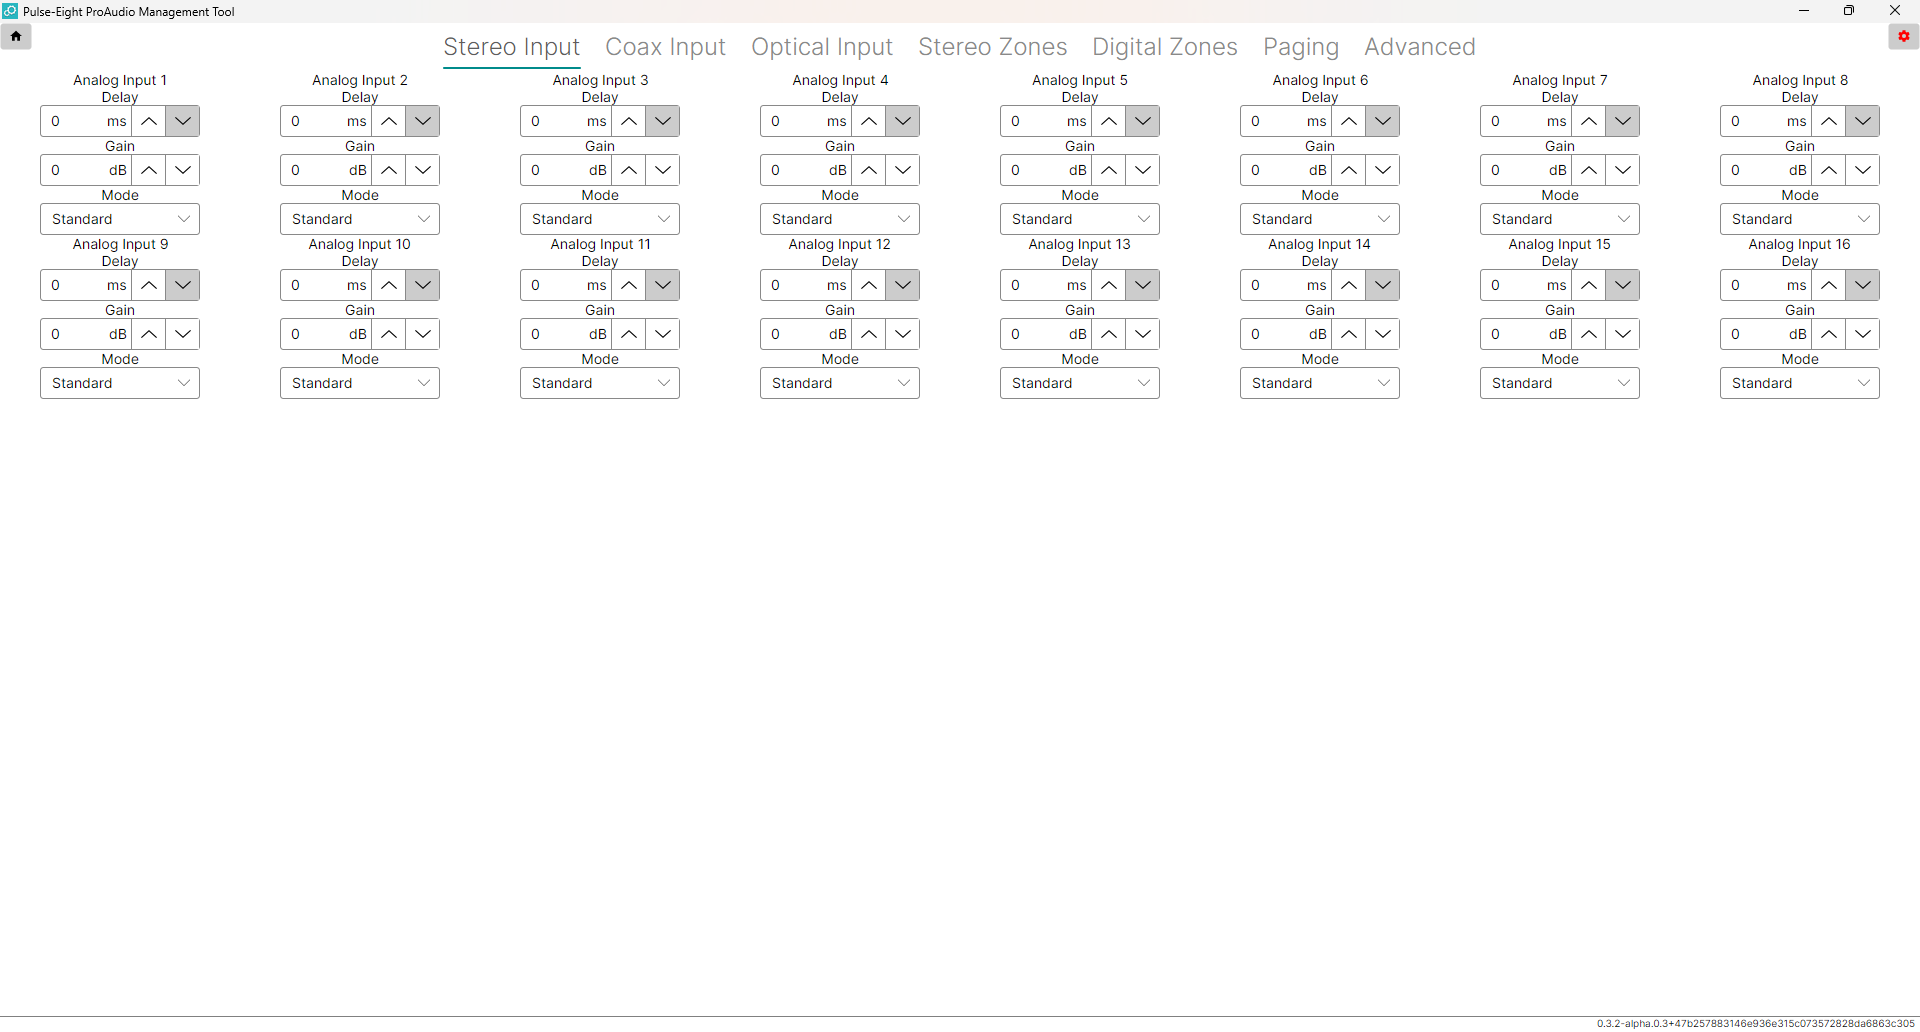
| Setting | What It Does |
|---|---|
| Delay | Adds lip sync delay on a per-source basis. Use when a video processor is connected before the source reaches the matrix. Range: 0 to 170.65 ms (shared with any zone delay on the same path). |
| Gain | Adjusts the level of this input from −24 dB to +24 dB. Use to match the output levels of different source devices so everything sounds the same volume when you switch between them. |
| Mode | Changes how the stereo channels are handled. Options include normal stereo, mono mix, left-only, right-only, and channel swap. Useful for sources that are mono or have unbalanced channels. |
Paging
Used to set up doorbell chimes, announcements, or any triggered audio event. Two physical switch inputs on the back of the unit each trigger a configurable preset.
Wiring the Switch Inputs
Both switches connect to the phoenix connector on the rear of the unit. There are two wiring options:
For simple push buttons, relay triggers, or doorbells. No voltage passes — just a circuit open/close. Best used with Timed On mode.
For devices that send a low-voltage signal (e.g. intercom, alarm panels, home automation). Can stay active as long as voltage is present.
Switch Configuration
For each switch, set the Mode, choose a Preset, and (for timed modes) set a Time.
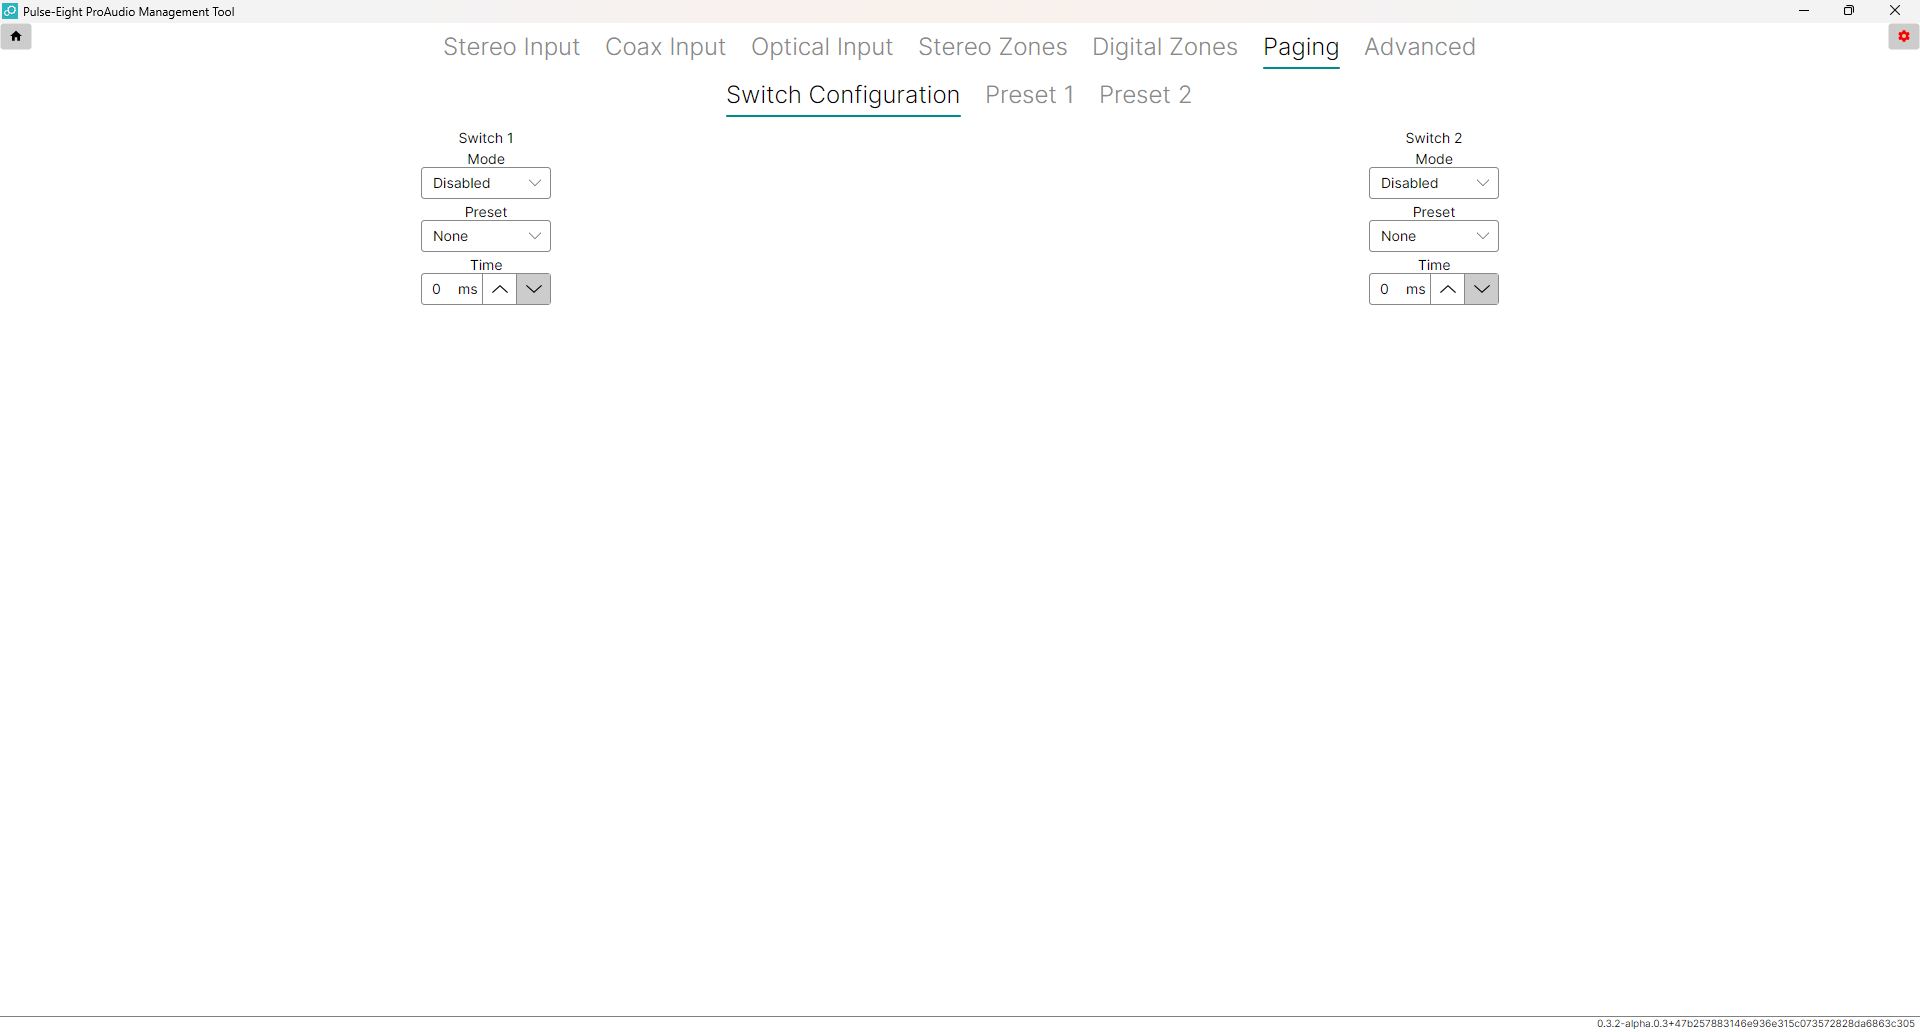
| Mode | When to Use It |
|---|---|
| Disabled | Switch is not in use. |
| Active On | Page plays while the button is held / voltage is present. Page stops when released. Good for intercom-style hold-to-speak use. |
| Active Off | Page plays while the circuit is open / voltage is absent. Useful for "alarm active" indicators. |
| Timed On | Press triggers a page that plays for a set duration, regardless of how long the button is held. Best mode for a doorbell. |
| Timed Off | Triggered when circuit opens or voltage drops. Page plays for a set duration. |
Preset Setup (Preset 1 & Preset 2)
Click the Preset 1 or Preset 2 tab to configure what happens when that preset is triggered.
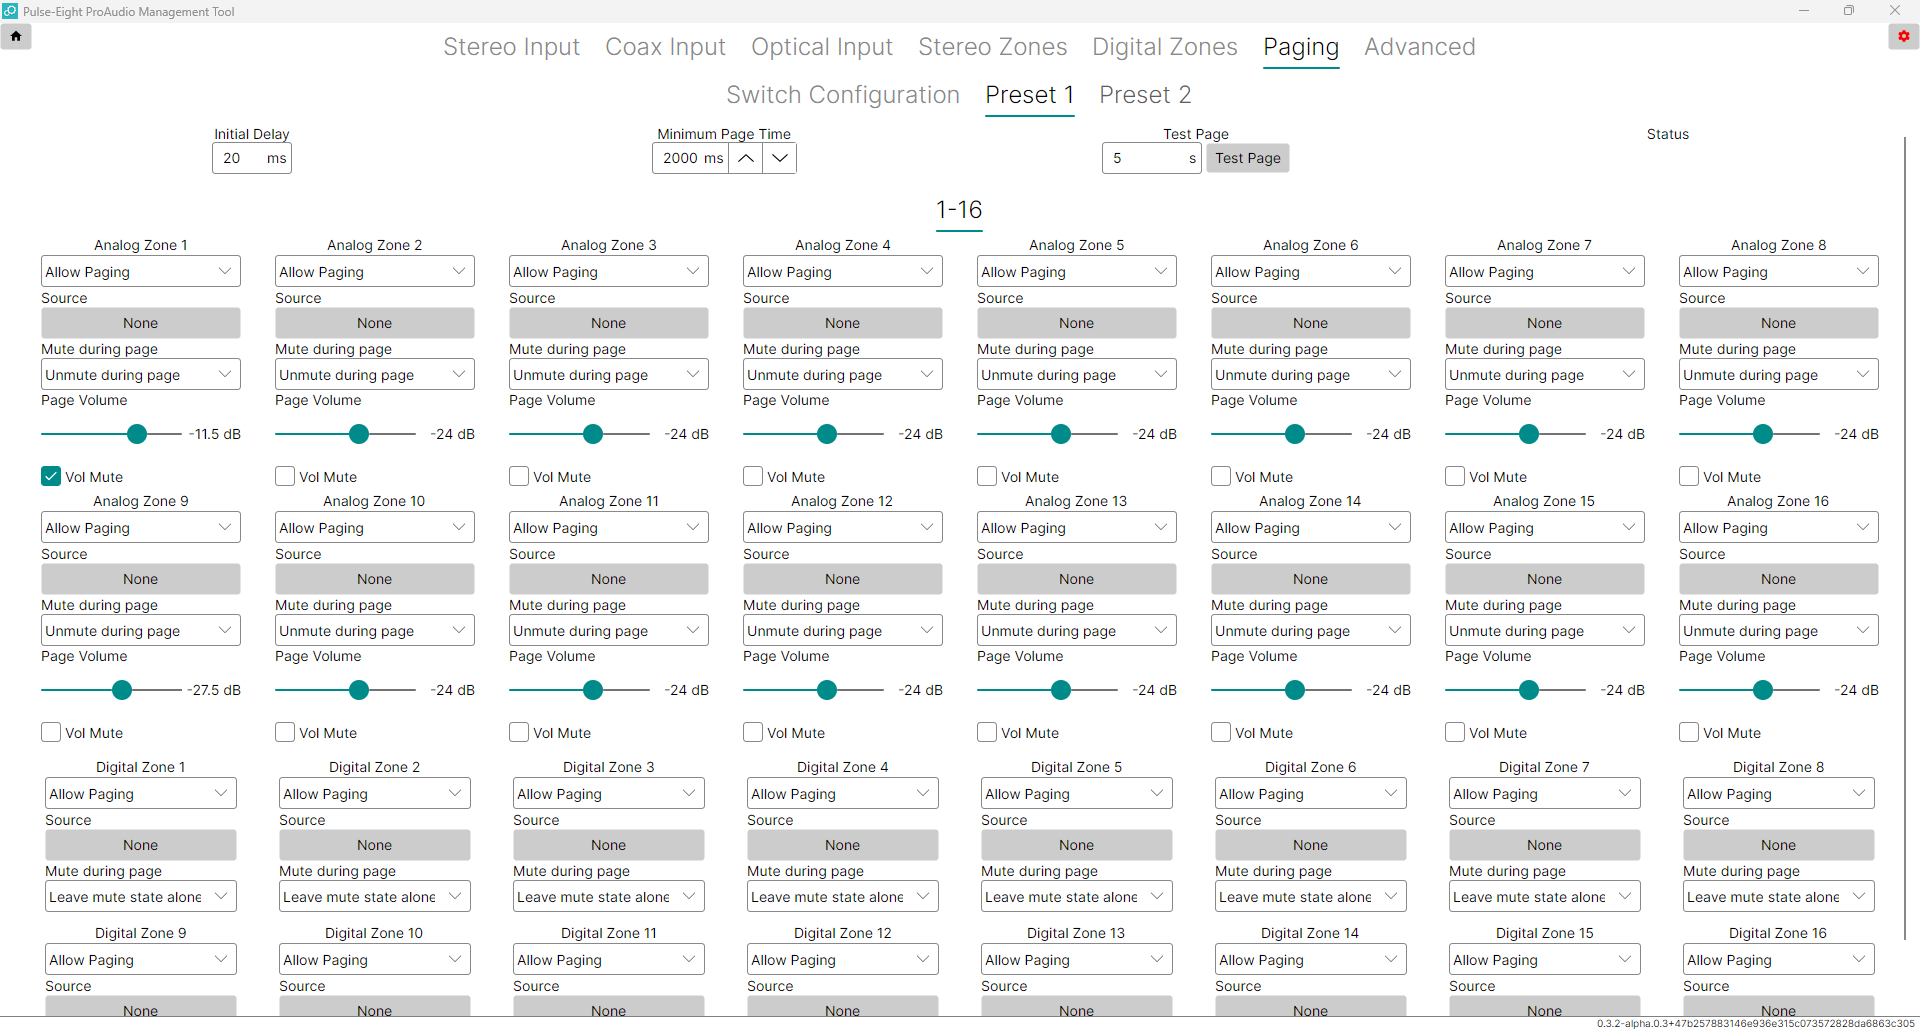
| Setting | What It Does |
|---|---|
| Initial Delay | Wait time before the page starts (0–30,000 ms). |
| Minimum Page Time | How long the page must run before it can end (0–120,000 ms). Ignored in Active On/Off modes. |
| Test Page | Simulates a trigger for testing — enter a duration and click the button. Status shows "PAGE ACTIVE" while running. |
Per-Zone Settings
Each zone can be configured independently for how it behaves during a page:
| Setting | Options |
|---|---|
| Allow Paging | Allow Paging — zone plays the page. Do Not Disturb — zone is completely unaffected. Mute Only — zone goes quiet but doesn't emit the page audio. |
| Source | Which input to switch to for the page audio (e.g. the input connected to your doorbell chime). |
| Mute During Page | Unmute during page — forces zone on so the page is always heard. Hard mute — silences the zone for the duration. Leave mute state alone — only plays in zones already active. |
| Page Volume | The volume level the zone plays at during the page. |
| Vol Mute | (Analogue zones only.) Ramps current audio down when the page starts, then ramps back up when it ends. |
Advanced
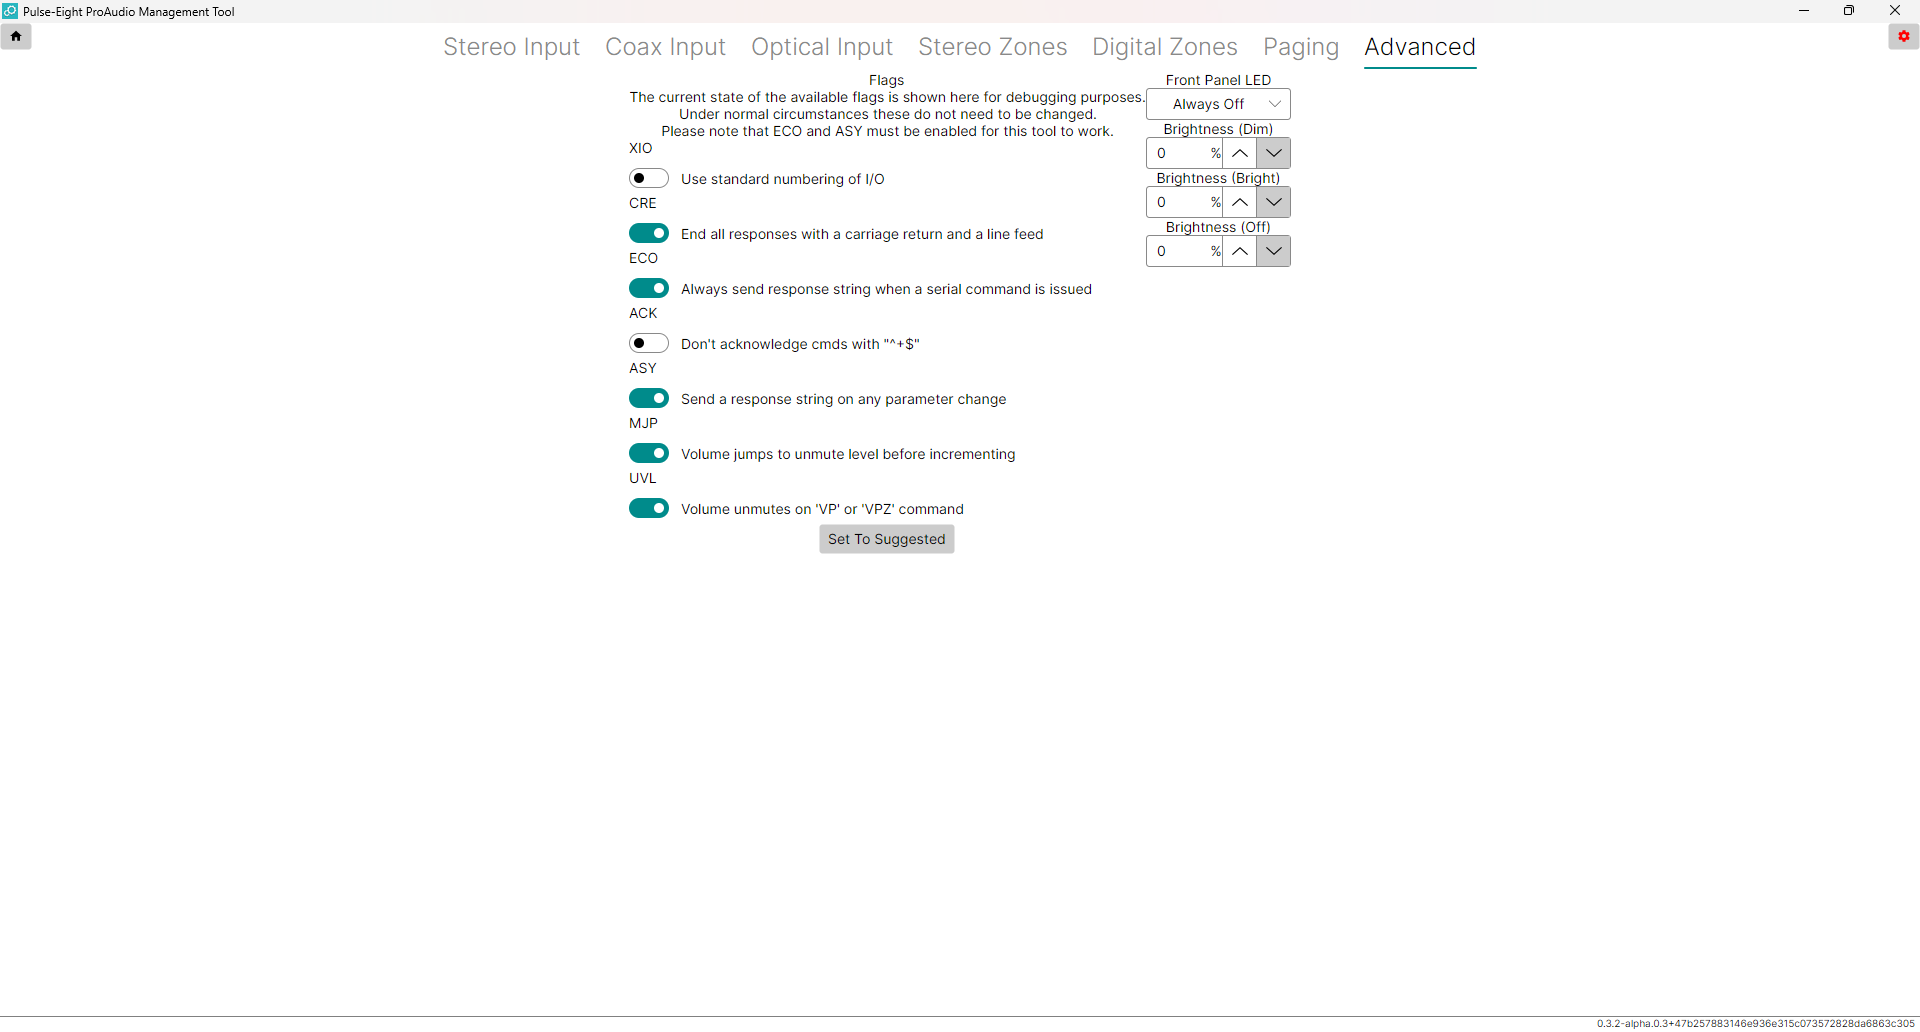
This tab contains system flags and LED settings. For most installs, clicking Set To Suggested is all you need. Only change individual flags if you have a specific reason to.
Front Panel LED
Choose how the LEDs on the front of the unit behave: Always Off, Always Dim, Always Bright, or Auto (changes based on activity). Set brightness levels for the dim, bright, and off states.
System Flags
| Flag | What It Controls |
|---|---|
| XIO | Enables Extended I/O numbering mode. Required by some control systems — check your driver's readme. In this mode, setting a zone to a non-existent source just mutes it. |
| CRE | Adds a carriage return + line feed to command responses. Useful when testing with terminal software. Safe to leave on. |
| ECO | Required. Sends a response string whenever a command changes a setting. The Config Tool needs this to stay in sync with the matrix. |
| ACK | Sends ^+$ after each error-free command to confirm it was accepted. Helpful for troubleshooting. |
| ASY | Required. Sends a response any time a parameter changes (e.g. from a control system or front panel). Keeps the tool's display up to date. |
| MJP | When on: pressing volume up on a muted zone jumps back to the previous unmuted level first. Good for single-user scenarios. When off: volume increments from wherever it currently is — safer in shared spaces. |
| UVL | When on: sending a volume command to a muted zone automatically unmutes it. Useful for touch panel control systems that send absolute volume values. |
Click Set To Suggested to apply Pulse-Eight's recommended flag settings. Review each flag against your specific install before accepting — suggested settings may not suit every setup
Related Articles
- Downloading and Connecting the ProAudio Config Tool (Windows)
- Subwoofer Setup Guide
- Checking the Fuse on ProAudio 8, 3248 & 3264 Before RMA
Get in touch and we'll help you get it sorted.
UK: 01202 413 610 | US: (858) 748-8250 | support@pulse-eight.com